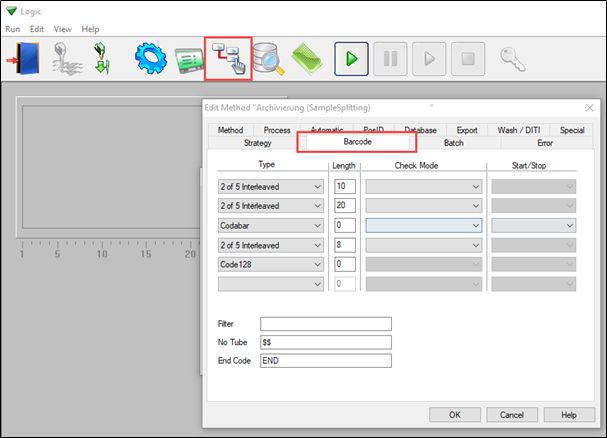
How to activate barcode types in EVO Logic™
This article explains how to activate and define user-specific barcode types in EVO Logic™.
- Start the EVO Logic™ application.
- Open the Methods Editor and choose a method.
- The following options can be defined under the “Barcode” tab:

- Type:
Choose the barcode types that should be recognized by the PosID. Do not select every type of barcode; only choose the barcode types used in the application.
- Length:
Specify the length of the barcode:
0 = the length of the barcode will not be checked
1–30 = the length of the barcode must match this value (checksum and start/stop code are also counted)
Note: Different lengths are not accepted.
- Check mode:
If this field is left empty, the checksum will not be checked. The available options are:
Evaluate/transmit = the checksum is checked and reported
Evaluate/don't transmit = the checksum is checked, but not reported
Note: Do not configure the software to ignore the checksum here. For barcodes without checksum, the length of the barcode must at least be specified.
- Start/stop:
Empty = a start/stop code is not required
Transmit = a start/stop code is required and reported
Don't transmit = a start/stop code is required, but not reported
Note: We highly recommend using the transmit function.
- Filter:
A filter for the sample barcodes can be specified here. A sequence of 0s and 1s must be entered, where “0” causes a character to be ignored. For example, if 00011110 is entered, only the characters from position 4 to position 7 will be regarded. If the first character is an “R”, the specified pattern will be applied right-aligned to the sample barcode.
Note: If this field is left empty, the barcodes will not be filtered.
- No tube:
This code signals an empty position in a linear rack.
- End code:
This code signals the end of a sample scan.
Next steps in case there are further questions:
- Note your serial number. Where do I find my serial number?
- Create a service request.
401813-003