New filters for the Spark multimode reader can be mounted by the user onto the filter slide. Please check out this article including a video tutorial How to change the filters of the Spark® reader.
After new filters have been mounted, they also need to be defined in the software. This article and video provide a step-by-step guide on how to define newly mounted filters in SparkControl.
A custom filter can be defined via the Filter Definition window in the Dashboard or Method Editor.
Open the “Instrument” menu in the Spark Control Method Editor and select “Filter”.

Fig.1: Spark Control Method Editor.
Alternatively, open the instrument tile in the Spark Control Dashboard.
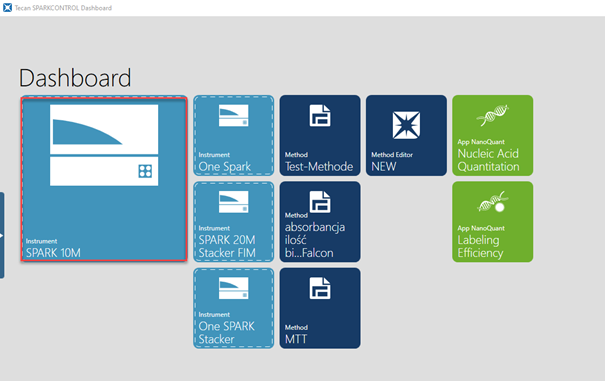
Fig.2: Spark Control Dashboard.
Select “Filter” in the action bar.
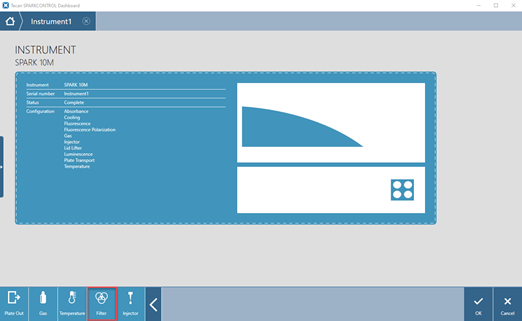
Fig.3: Instrument tile in the Spark Control Dashboard.
Upon selecting “Filter” in the action bar, choose between the excitation or emission filter slide. The corresponding filter definition window opens.
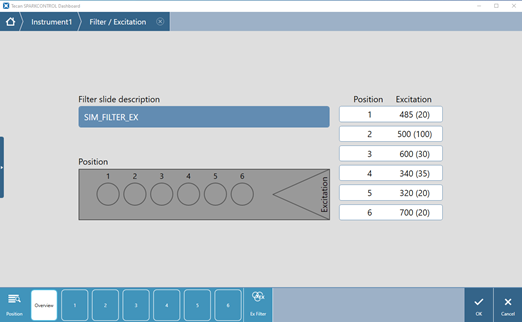
Fig.4: Filter definition window for excitation filter slide.
Position/overview: The “overview” button displays the current filter slide definition. Optionally, a filter slide description can be entered.
Positions 1 – 6: Buttons corresponding to positions 1 to 6 display the position of a given filter on the filter slide. Select the appropriate filter position and enter the “Wavelength” and the “Bandwidth” for the new filter:
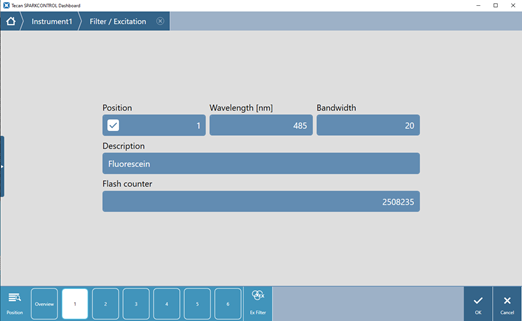
Fig.5:Defining a filter for position 1
Use the “Description” field to add remarks about the filter, like filter name, application, etc.
Flash Counter: The “Flash counter” monitors the number of flashes the filter is exposed to. The number of flashes is saved together with other information about the filter on the microchip. If the filter is replaced this information is lost.
Further help
For further help, please refer to our Helpdesk.
Link to Tecan Product Page
401821-010